|
|
|
SupportInstallation Guide - Dual - Band WiFi DSL Modem - SmartRG-SR516acGetting Your Internet RunningCheck your modem package contents. It should contain the items shown here:  Front Panel LED Explanation  Connect Your Modem  Refer to your modem user guide or follow the steps below:
Now, you can now connect your devices to the modem with network cable or WIFI(SSID & WIFI Key at the bottom of the modem) ATTENTION: Your Modem has been pre-programmed. Normally you may skip the sections below.1. Before Setup - Reset your modem & unplug modemConnect your computer to the modem with Network Cable or WIFI Press and hold the Reset button (hole) for 30 seconds on the back of the modem. After that, unplug the modem for 10sec. Then, open a web browser and type: 192.168.1.1 into the Address bar and press ENTER  Login Page (for modem only)- By default, User Name: admin & Password: admin 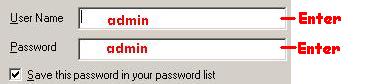 Click "Manage Gateway (advanced)" 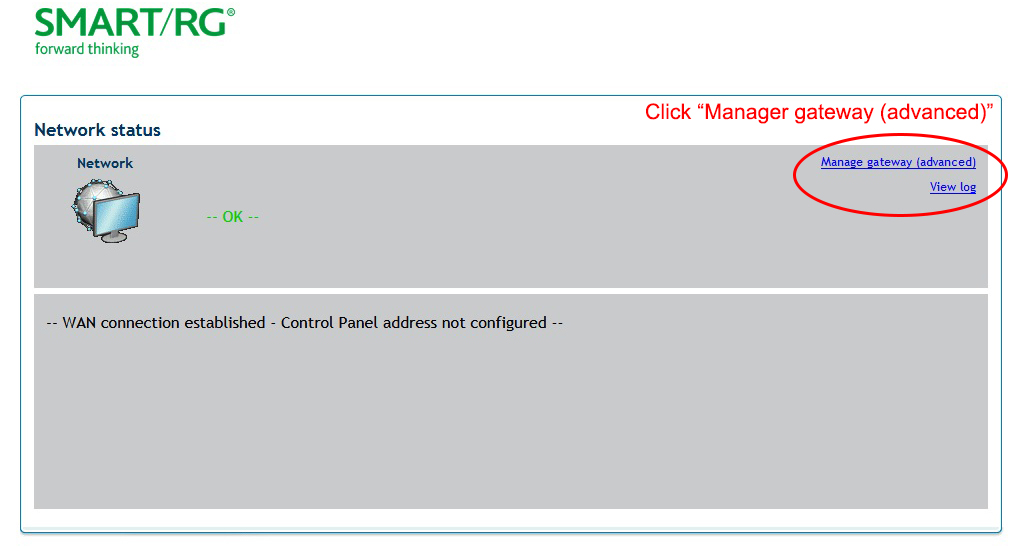 On the Left side menu Click “Management” ➔ “Settings” ➔ “Restore Default 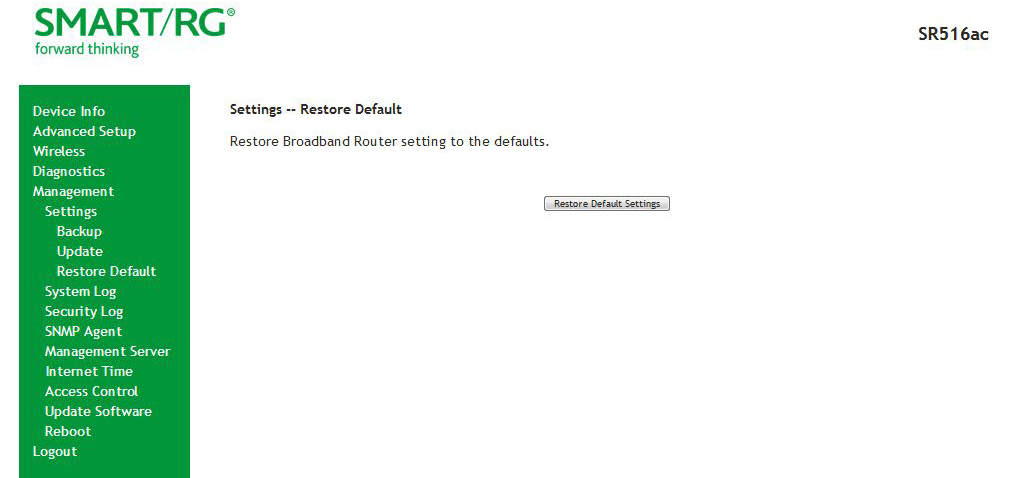 Reboot your modem. You modem was restored to factory default 2. Set up your modemClick Advanced Setup ➔ Click WAN Service. The Wide Are Network (WAN) Service Setup table should appear as below. (Remove anything present by checking the Remove box(es) and click the Remove button. 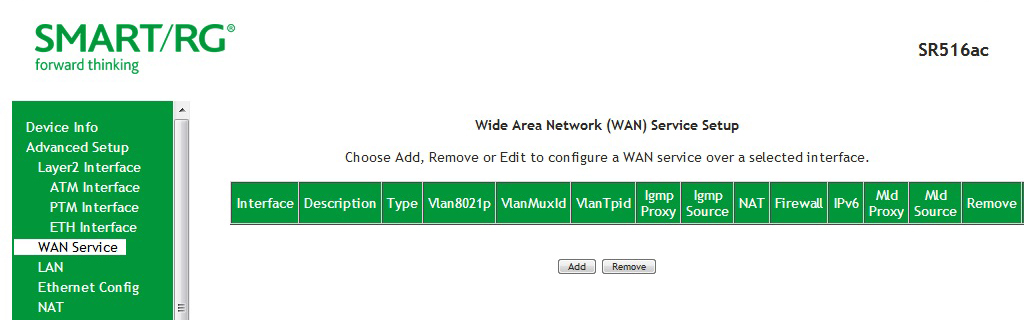 Click Layer2 Interface ➔ Click PTM Interface. The DSL PTM Interface Configuration table should appear as below. (Remove anything present by checking the Remove box(es) and click the Remove button. 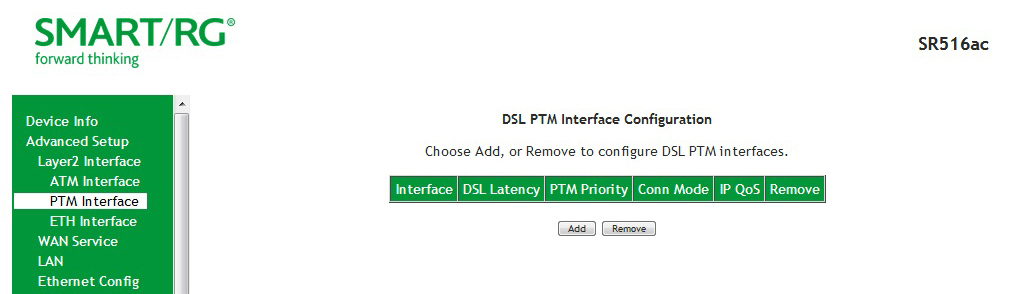 Click Add button on PTM Interface Page 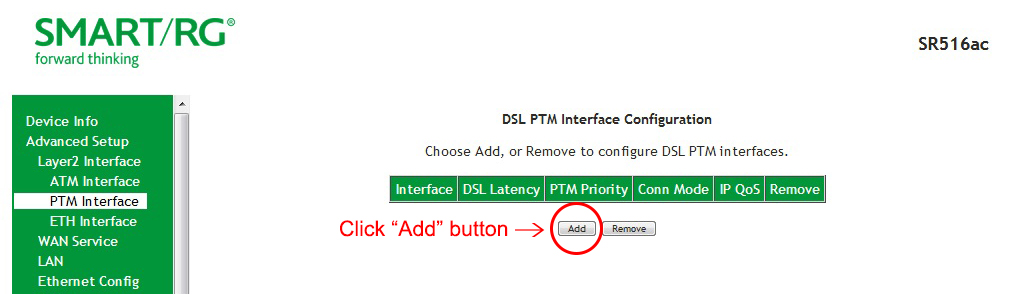 Check Path0 (Fast) and Path1 (Interleaved) boxes ➔ Click Apply/Save 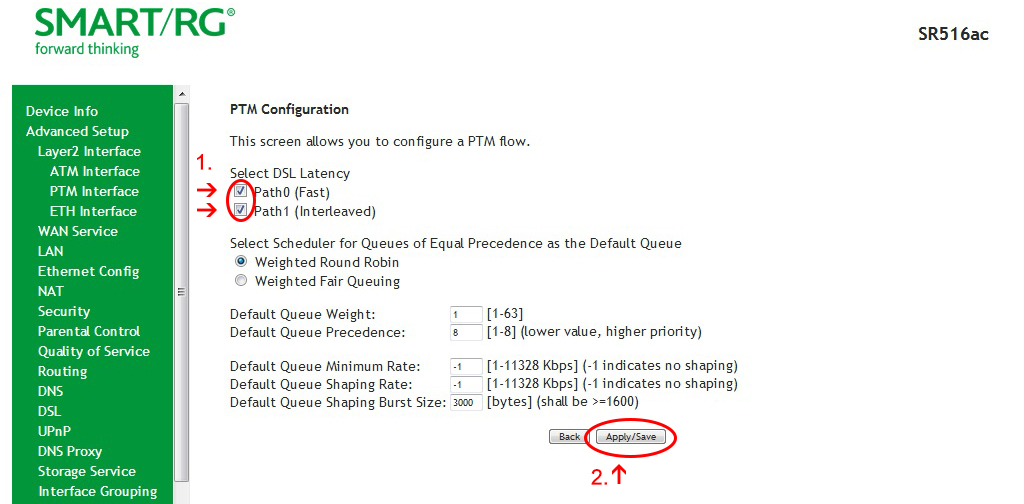 Click WAN Service ➔ Click Add button 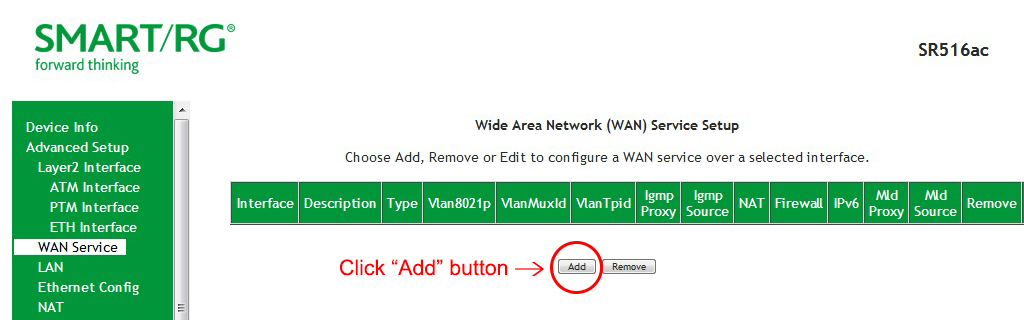 Select ptm0/(4_1_1) from the dropdown list. Click Next  Enter 802.IP Priority = 1 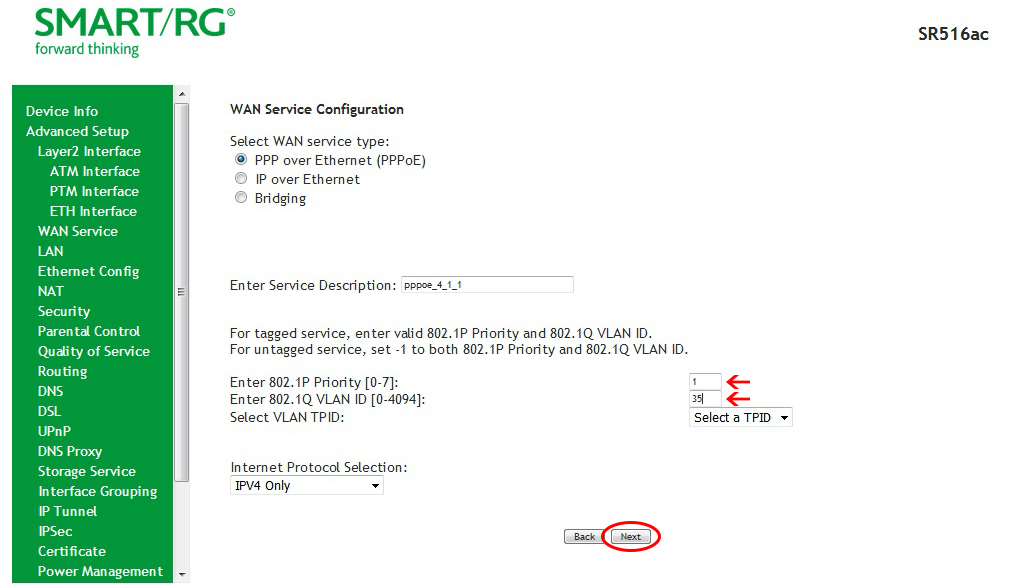 Enter your World-Link Username into the PPP Username field 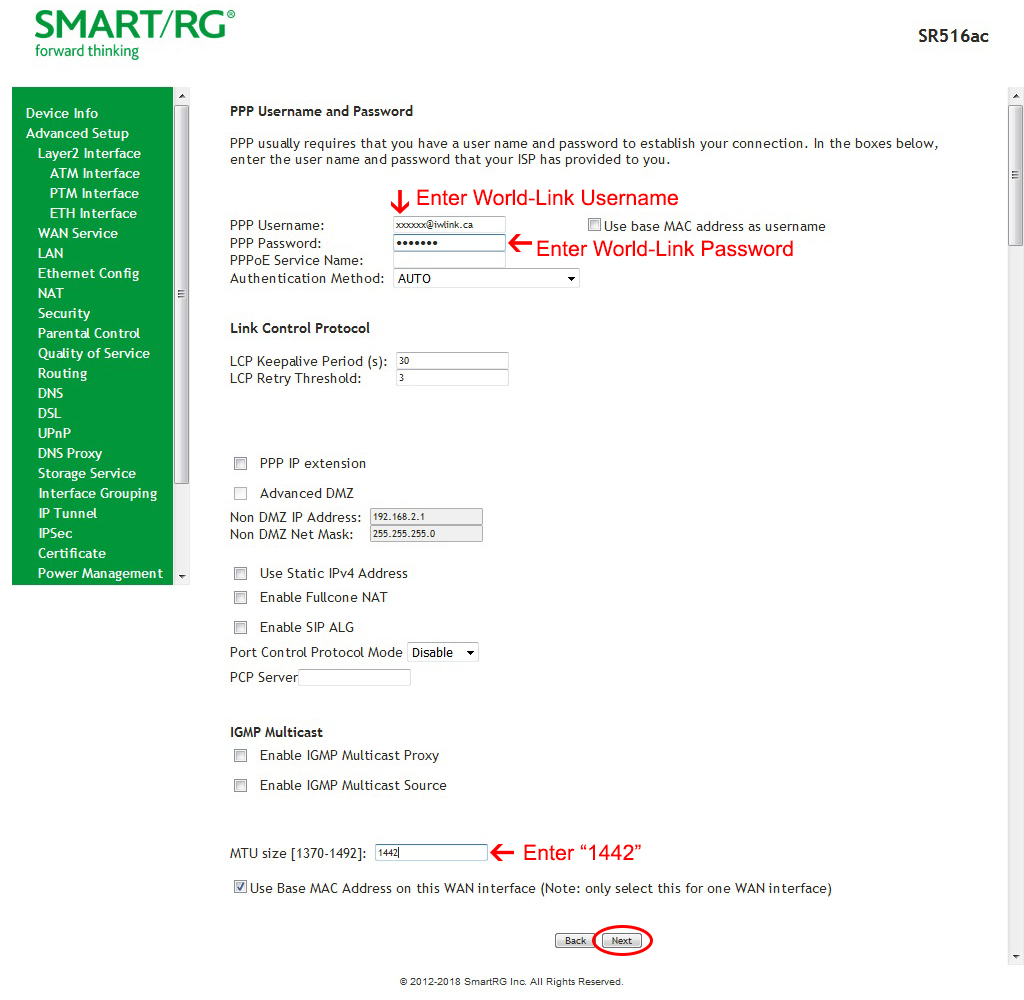 Routing – Default Gateway Page 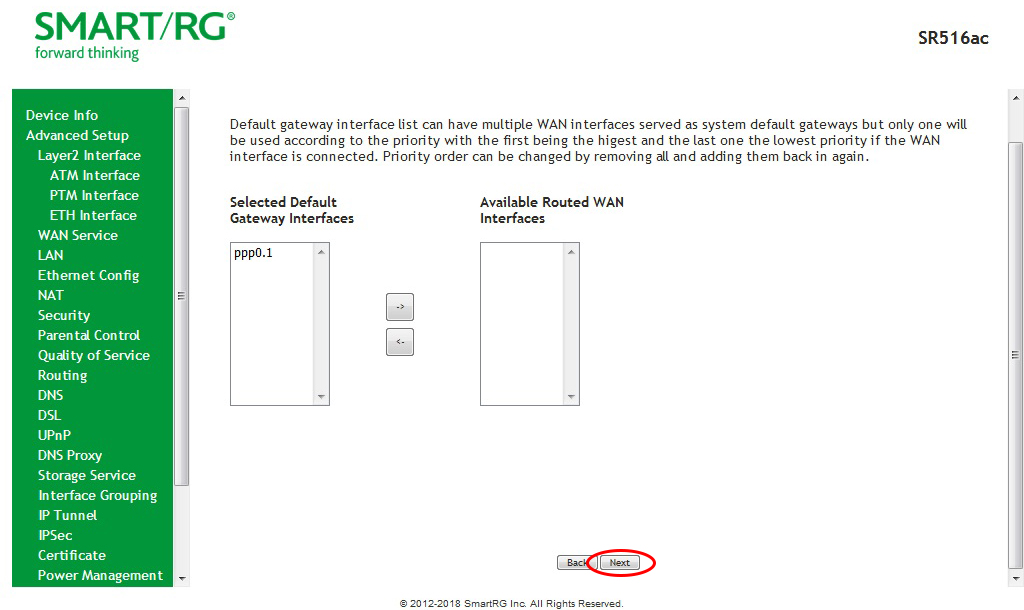 DNS Server Configuration Page 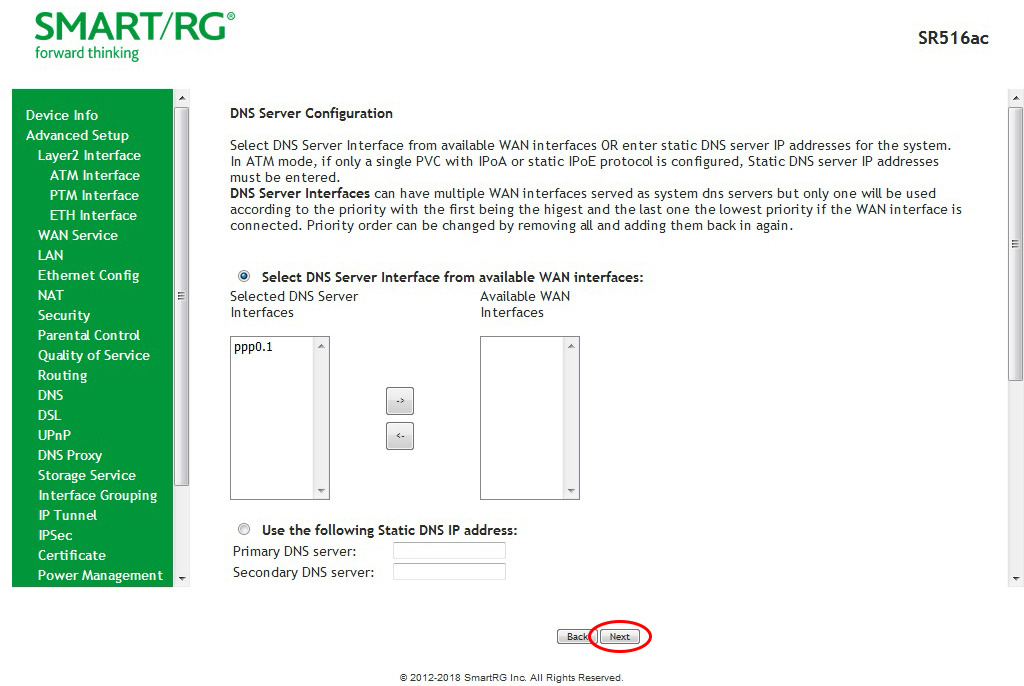 WAN Setup – Summary page 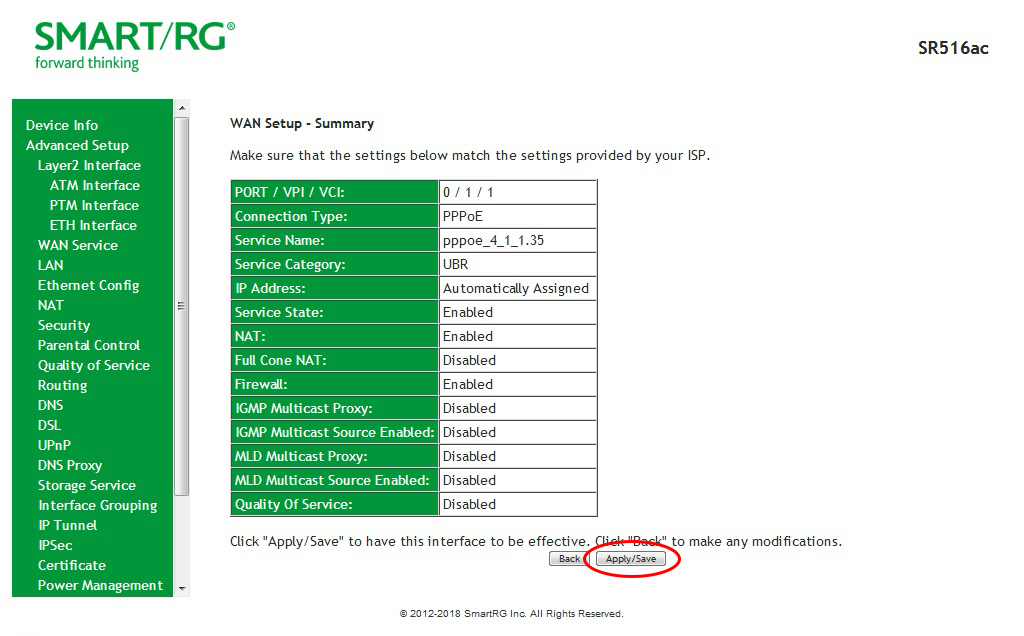 Advanced Setup ➔ DSL 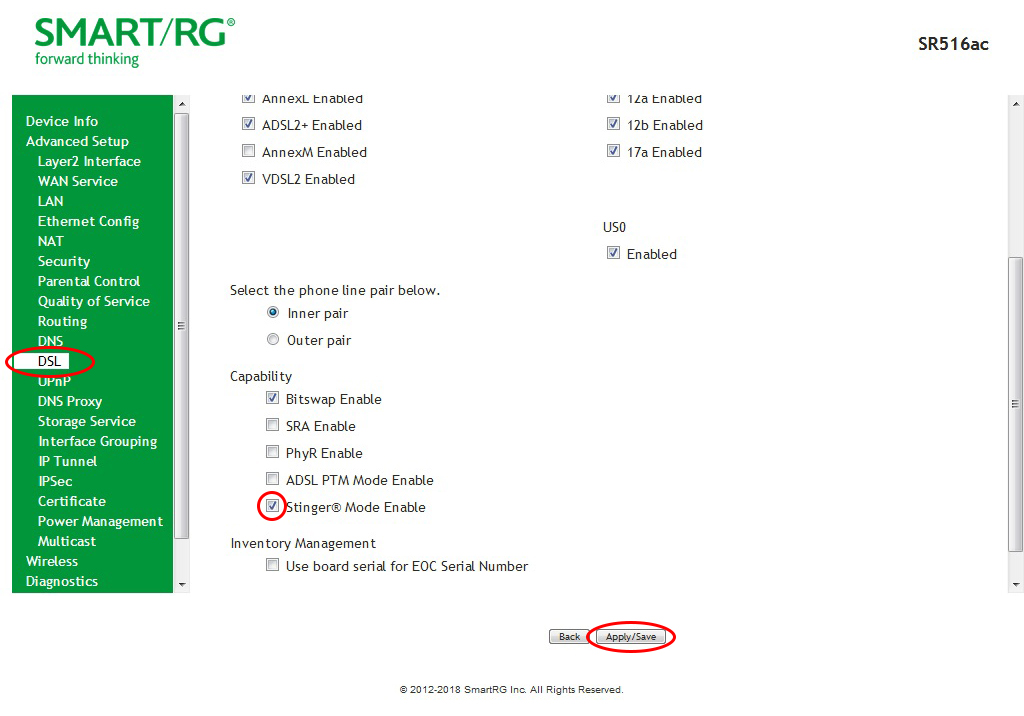 Congratulations! Your Connection is up and running and you should be able to browse the Internet. 3. Wireless SetupWIFI SSID (2.4G and 5G) and WIFI Key have been programmed as default as shown on the label of the modem. Unless you want to set the SSID to your desired wireless network name, you don’t need any set up on wireless. Change WIFI SSID name 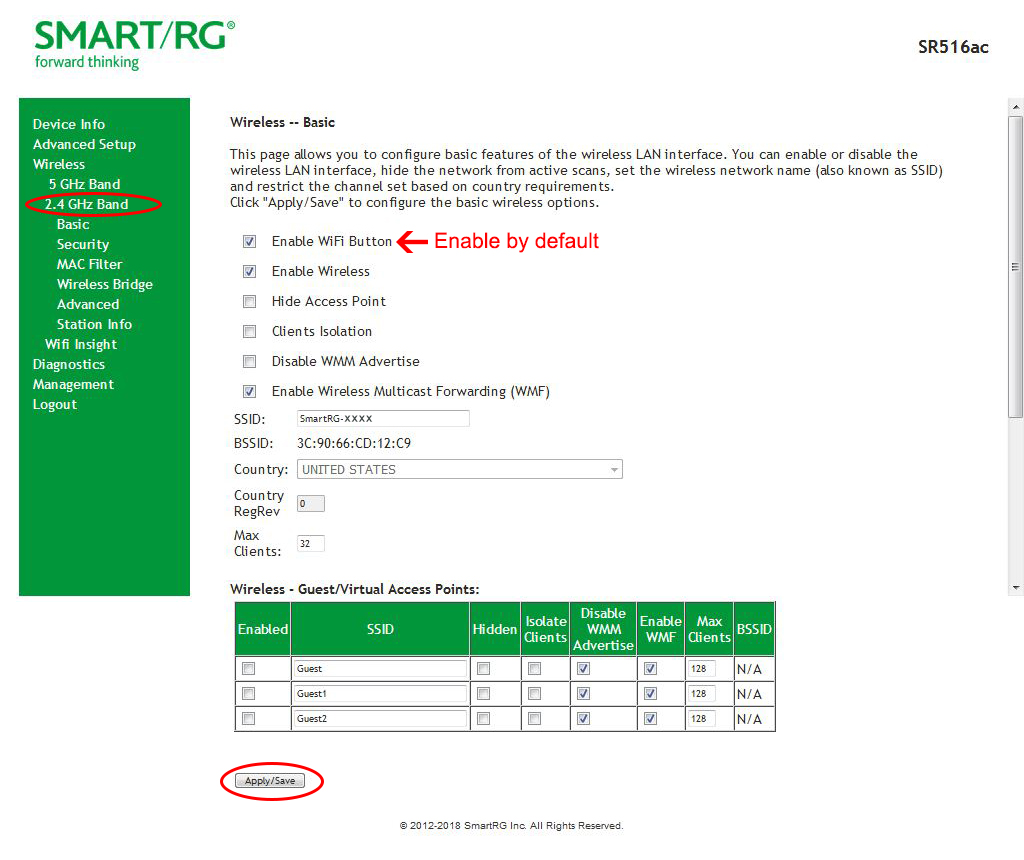 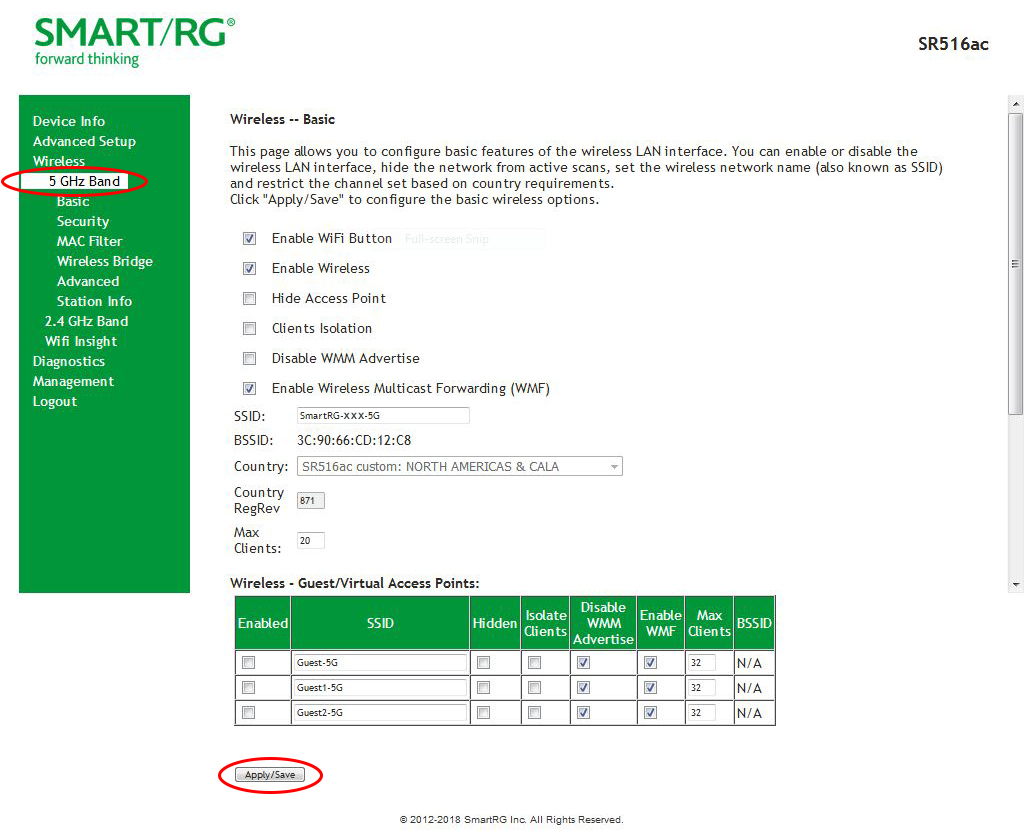 Click Security 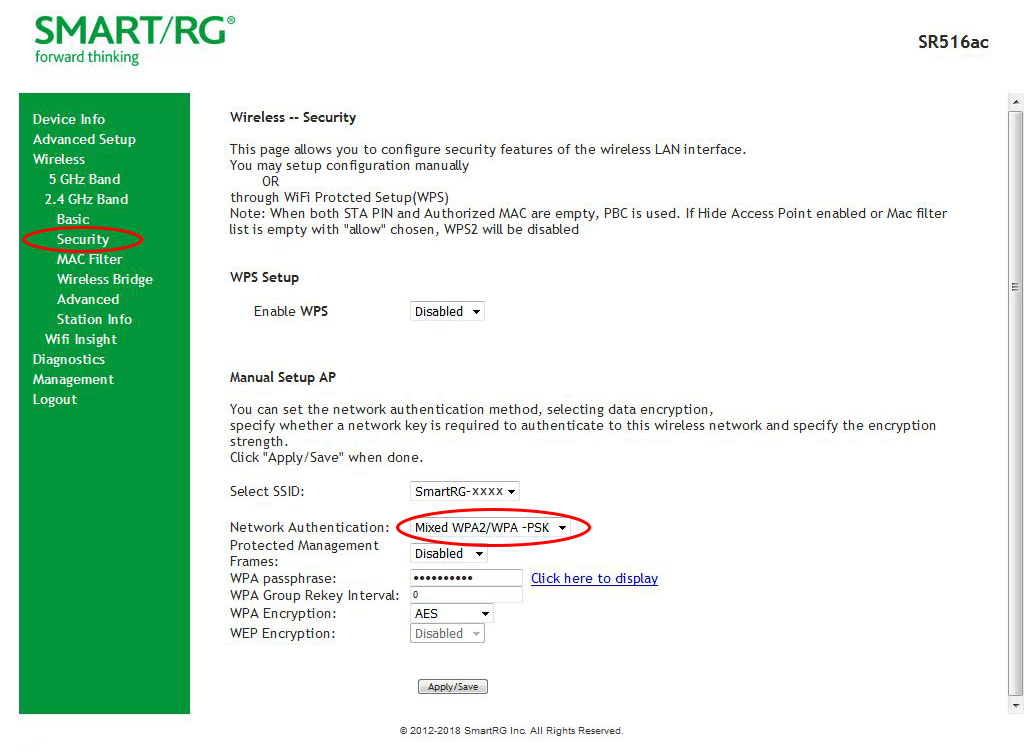 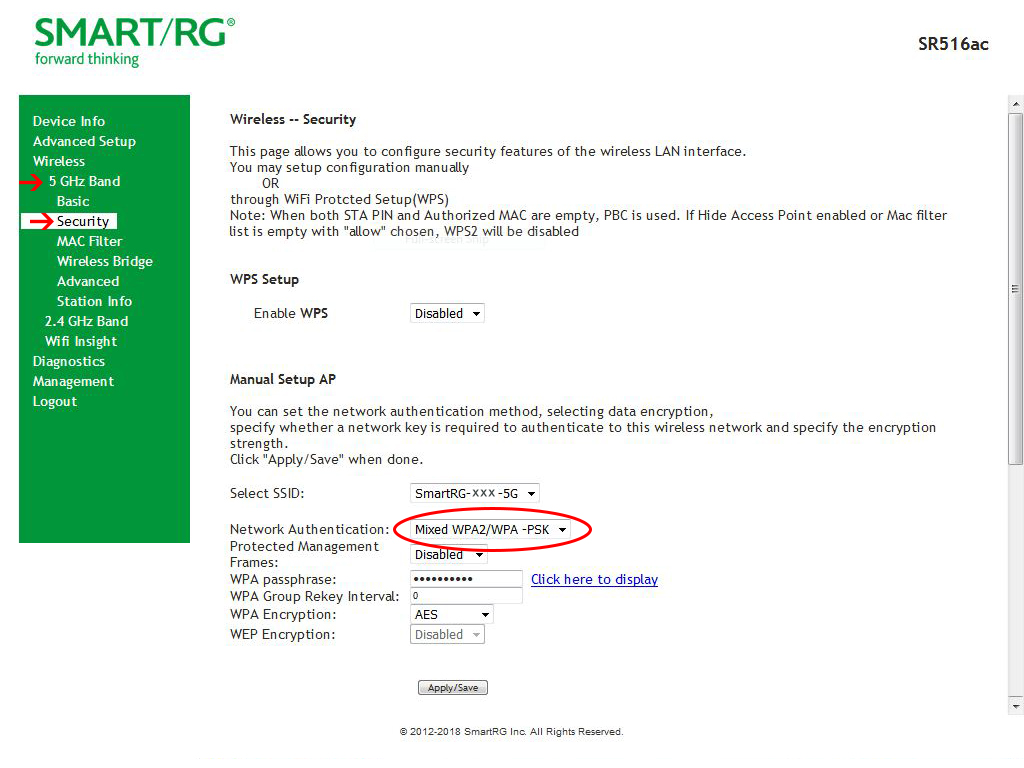 Change Wireless Channels (only if necessary) Click Wireless ➔ Advanced 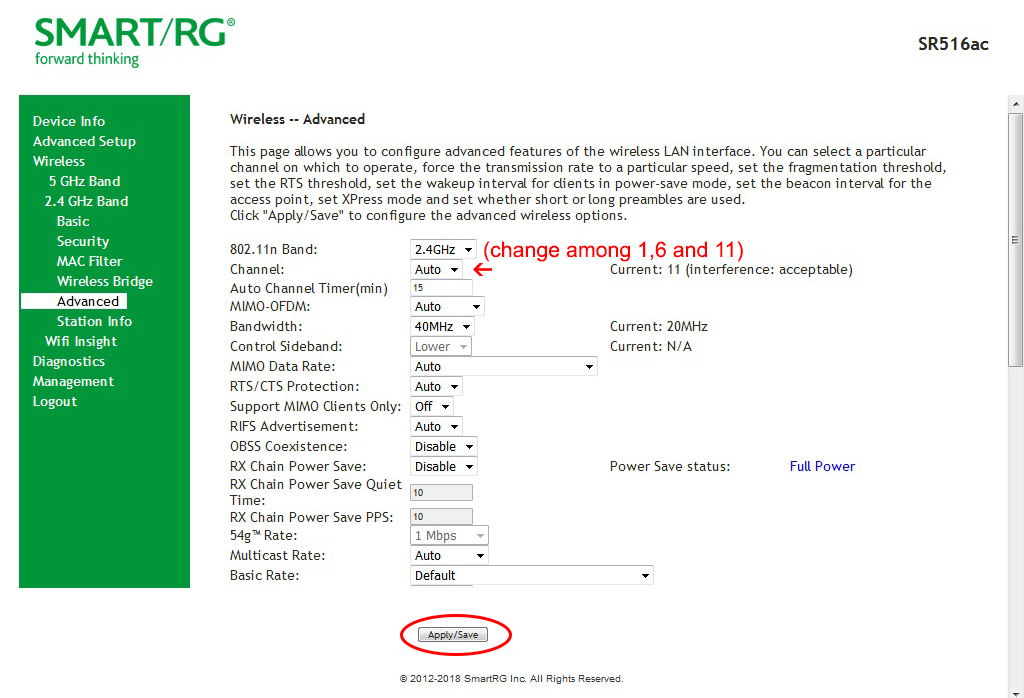 Installation Guide – Dual-band WIFI DSL Modem - SmartRG-SR516acIf you don't have the software, you cannot open this file. Please download free Adobe Acrobat Reader. |
|